
Understanding Vapor Barrier Installation
What is Vapor Barrier Installation?
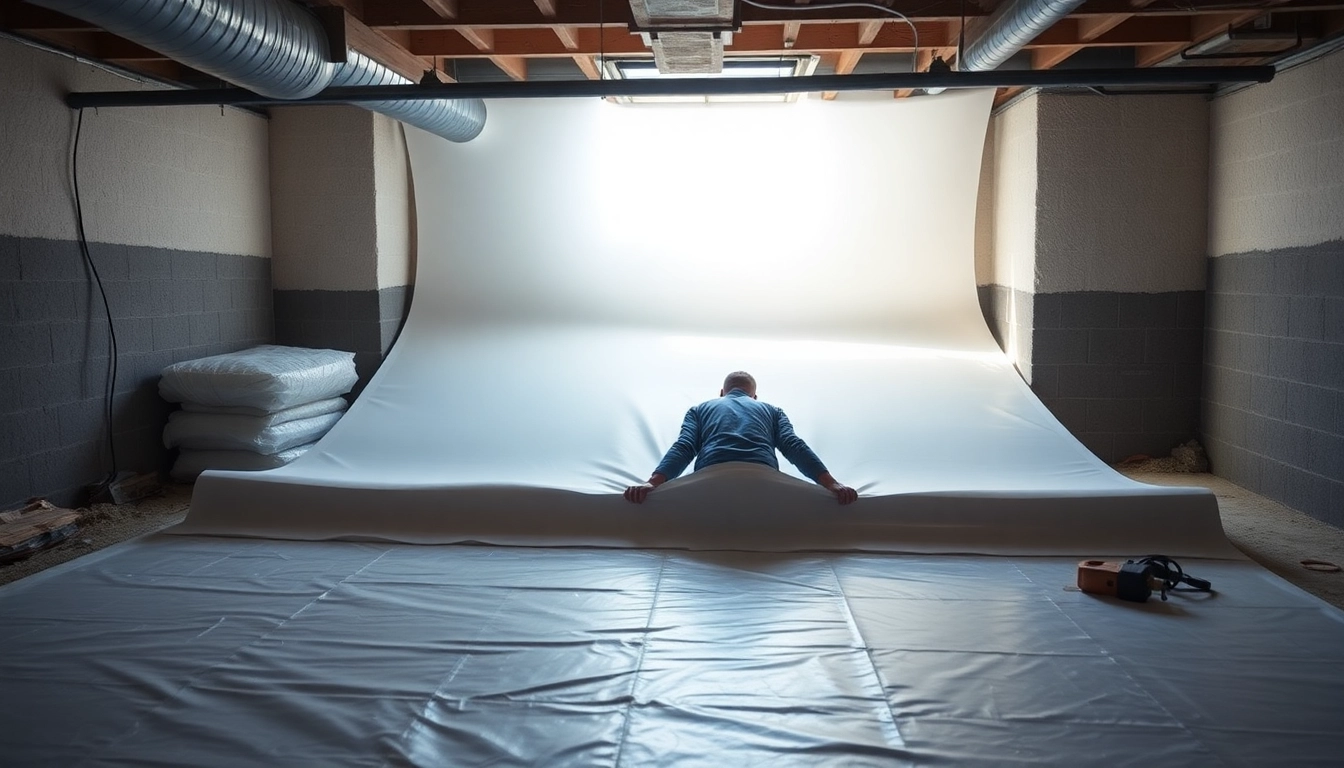
Vapor barrier installation involves the process of implementing a physical barrier designed to impede moisture movement from the ground or surrounding areas into your crawl space or foundation. This installation is essential for preventing excess humidity, mold growth, and structural damage within your home. A vapor barrier is commonly made from polyethylene plastic or foil, effectively blocking moisture-laden air and ensuring a drier environment beneath your home. Communities with high humidity levels or poor drainage systems especially benefit from this protective measure. For a thorough understanding and professional service regarding Vapor Barrier Installation, certain preparatory steps and considerations must be addressed.
Benefits of Vapor Barrier Installation
Investing in a vapor barrier installation offers several compelling benefits:
- Mold Prevention: By reducing moisture levels, vapor barriers prevent mold and mildew formation, thus safeguarding your health and home.
- Improved Indoor Air Quality: A drier crawl space results in cleaner air circulation within your home, minimizing allergens and irritants.
- Energy Efficiency: Effective moisture control can lead to reduced energy costs, as insulation works more efficiently in a drier environment.
- Structural Integrity: Protecting your foundation and wooden structures from moisture damage preserves the overall integrity of your home.
- Enhanced Comfort: A consistent humidity level adds to the overall comfort and livability of your home environment.
Common Misconceptions
Understanding vapor barrier installation involves dispelling some common misconceptions that can lead to ineffective moisture control:
- All Crawl Spaces Need Barriers: While many benefit from vapor barriers, the necessity depends on various factors like soil type and regional climate.
- Vapor Barriers Cause Moisture Trapping: When properly installed, vapor barriers manage moisture effectively instead of trapping it, providing a balanced air quality.
- Cost vs. Value: Many homeowners view the cost of installation as a burden rather than an investment in their home’s durability and value.
Preparing for Installation
Essential Tools and Materials
Before beginning the vapor barrier installation, gather the necessary tools and materials for a smooth process:
- High-quality polyethylene plastic sheeting (typically 6 mil or thicker).
- Utility knife or shears for cutting the plastic.
- Measuring tape for accurate sizing.
- Stapler or tape for securing the barrier.
- Rocks, bricks, or weighted materials to hold the barrier in place.
- Gloves and safety goggles for protection during the installation process.
Assessing Your Crawl Space
Before installation, it is critical to assess the crawl space thoroughly:
- Size and Shape: Measure the dimensions of the crawl space to ensure you purchase sufficient vapor barrier material.
- Soil Type: Evaluate the soil composition; some types hold moisture more than others, impacting the installation choice.
- Drainage System: Check for existing drainage issues that may need to be addressed prior to installation.
Safety Precautions
Safety is paramount during the installation process. Follow these precautions:
- Ensure adequate ventilation in your crawl space to avoid inhaling harmful dust or fumes.
- Wear appropriate personal protective equipment, including gloves and safety glasses.
- Be mindful of electrical wires or plumbing systems that could be present in the crawl space.
Step-by-Step Installation Guide
Assessing Dimensions and Sizing the Vapor Barrier
Begin with thorough measurements to determine the size of your vapor barrier:
- Measure the length and width of your crawl space.
- Account for any obstructions, such as posts or foundations, that may require separate pieces of barrier material.
- Cut the polyethylene sheeting to fit the calculated dimensions, ensuring an overlap where applicable.
Securing the Barrier Properly
Once the vapor barrier is cut to size, follow these steps to secure it:
- Begin at one corner of the crawl space and position the barrier flat against the ground.
- Use staples or adhesive tape to affix the edges of the barrier to the foundation walls.
- Ensure the barrier overlaps at seams by at least 12 inches to avoid gaps where moisture can enter.
Sealing and Finishing Touches
The final steps of a successful vapor barrier installation involve sealing and adding finishing touches:
- Seal any joints or seams with waterproof tape or sealant to ensure no moisture can penetrate.
- Consider installing additional weights along the edges to secure the barrier and prevent it from shifting.
- Inspect for any gaps or weak points, ensuring the installation is tight and secure.
Maintenance and Monitoring
Regular Inspections for Effectiveness
To maintain the efficiency of your vapor barrier, routine inspections are necessary:
- Check for signs of moisture accumulation, mold growth, or damage to the barrier.
- Inspect the crawl space once every few months or after heavy rain events.
- Address any concerns immediately to prevent larger issues.
Signs of Damage and Repairs
Be vigilant for signs indicating that repairs are necessary:
- Visible tears or punctures in the vapor barrier.
- Presence of mold or musty odors in the crawl space.
- Puddles or wet soil in areas where the barrier has been installed.
Maintaining Ideal Humidity Levels
Maintaining ideal humidity levels is crucial for effective moisture control:
- Use a hygrometer to monitor humidity levels in your crawl space.
- Aim for a relative humidity level between 30-50% for optimal air quality.
- Install a dehumidifier if necessary, particularly in regions with high moisture levels.
FAQs About Vapor Barrier Installation
What materials are best for vapor barriers?
The best materials for vapor barriers are typically high-density polyethylene or foil-backed options, known for their durability and effectiveness in moisture retention.
How thick should a vapor barrier be?
A vapor barrier should be at least 6 mil thick for residential applications. Thicker materials provide added durability and protection against punctures.
Can I install a vapor barrier myself?
Yes, many homeowners can successfully install a vapor barrier themselves, especially with the proper tools and guidance. Always prioritize safety and accuracy during installation.
What are the risks of not having a vapor barrier?
Without a vapor barrier, homes are susceptible to moisture damage, mold growth, reduced indoor air quality, and compromised structural integrity, leading to costly repairs.
How long does a vapor barrier last?
A properly installed vapor barrier can last over 20 years but may need inspection and potential replacement depending on environmental conditions and damage.